Sunday, February 22, 2015

Inspired by Inspirations and a fish

On the plane home at the beginning of the month, I was reading Inspirations 84 when a little project caught my eye--a pin cushion done in Deerfield Embroidery. Deerfield is in Massachusetts, but I had never heard of this type of embroidery, a Jacobean inspired blue work done with linen threads. What appealed to me about the project was the variety of stitches--14 different stitches done with one, two or three threads. I wanted to play with it, but I didn't really like the pattern. I did, however, like the motif on the saucer in the photo to the right of the actual embroidered piece. The more I looked at it, the more I thought that I could follow the pattern instructions using the different motift. That's what I determined to do.

The pattern from Inspirations is the bird on the left. My inspiration is the saucer on the right.

First I copied the magazine page and blew up the dish until the motif was approximately the same size as the pattern. Then I traced the pattern, substituting two of the pattern flowers for the plate motifs. I bought the same threads as indicated in the pattern and some cotton cloth and went at it, using the magazine instructions to do each section of the fish. I even embroidered the outline using the same stitches. The only thing I substituted was the woven spiderweb shells for the trellis work flower from the original pattern.

My initial tracing.

After doing the stitching, I resolved to try Mary Corbet's scalloped beading on the edge. That was a little disappointing. I don't know if my tension was too tight or too loose, but the beautiful scallops she achieved in her tutorial weren't really appearing on my work. The beads were easily knocked out of kilter when buttonholing them onto the bars. Even so, it was good practice and I generally like the results. Maybe somewhat bigger beads would help.

The finished piece was a good experiment, although a little lopsided.

I regret, however, that I did the project on cotton. It just wasn't strong enough. I have resolved to make a few improvements to the pattern and to work it again on linen--this time in color. But for now, my new little ornament is hanging from my secretary in the dining room and looks splendid. I like my resolution to play with stitches. It takes the tedium away from having to produce to a deadline.

I have already found my next little project--a tiny sampler with a pulled work hem. I've never done any pulled work, so it meets my criterion of trying new techniques. I can't wait to start!


Sunday, February 15, 2015

Resolutions

I realize that February is a little late to be making resolutions. Mine have been bubbling around in my mind for quite awhile though. When I took a short stitching staycation over Martin Luther King Day weekend I was vaguely aware of them, but they weren't actually codified. And if I don't write them down, I can't hold myself accountable. Good thing that the resolutions aren't as difficult as last year's! Basically, my idea is that after a year of stitching for others, I will take this year and stitch mostly for me. I am finally going to stitch a wedding sampler for myself and my husband (I've stitched four since we got married, all for other people); I am going to work on the First Day stumpwork pattern I got out of Inspirations; and I will try new techniques as I see fit, without any pressure to accomplish specific projects. Basically, it will be a year of play. And to balance myself, I will also expand my charity work and make at least 12 blankets for Gabriel House, as well as baptismal bibs as I am able to.

I am succeeding so far and it is fun. Over that long weekend in January, I actually started my stumpwork piece. Each of these leaves took 1.5 hours. I needed magnifiers to do this work--something I haven't needed in the past--and light. The light in my apartment is not good enough, so I went rummaging through my drawers and finally found the Beam and Read. My mother sent this to me a few Christmases ago. I read Mary Corbet's positive review of the lamp, but I had never used it. It is now my new favorite stitching tool because you can focus a very bright light easily wherever you want it and it doesn't disturb others the way a strong overhead light does. It is fantastic. I couldn't have done these leaves without it. This will be my Colorodo project because it needs great blocks of time.

I also started prepping my sampler, which is derived from Moira Blackburn's Time and Season sampler pattern. I wanted to alter the middle to hold our wedding information. I started charting it out on graph paper, but was frustrated in a few minutes, so I looked for apps to help me. I tried out a few, but Stitch Sketch was the one that worked for me. I still need to learn a lot more about the program, but it is powerful and relatively easy to use. The best part is that it converts your pattern to PDF so that you can print it easily for stitching. I did the whole pattern in one color so I can choose the colors later, but the app has the whole range of DMC colors to choose from. It is nifty

Of course, it still took me all day to chart this information, but I was able to move the motifs around and chart our our names and wedding date with much less frustration than if I had to use an eraser. While I was doing so, I also got to know the inconsistencies of the sampler pattern better. For example, the center motif is not in the exact center of the pattern. That is something that would have thrown me while stitching if I hadn't discovered it while charting.

What was less successful is that I decided to baste out 10-stitch square intervals on my fabric to help with accuracy when I stitch. I worked another 3 hours on that and I have about 1/4 of the horizontal lines done. I think that is all I will do. I can't stand the basting--especially since I need to wear magnifiers to see the 32-count fabric. This will be my Rhode Island project, but I still have to stretch it.

These will be this year's major projects, but I hope to do some small ones as well. I already have a new idea for another painted and embroidered landscape, and I am working on a little project adapted from Inspirations # 84. I should have that one done by next week.

By the end of last year, I was starting to feel uninspired. All the stitching I did for wedding, birthday, and Christmas gifts was fun, but it was also burdensome. The pressure to have things done on time got to me, even though most of the Christmas presents had been stitched the previous winter. This year, there will be no deadlines. We'll see how it works!


Sunday, February 8, 2015

Tea for four

For Christmas my husband gave me a gift certificate for four for tea at a local tea shop. I immediately began organizing my tea for February. I secured the date with my girlfriends and then sent hand written invitations. Immediately these women, most who have met each other, but don't know each other well, began discussing the dress code. Should we wear dresses? Hats? Gloves? Full Victorian gear? It got a little out of hand! I wound up telling everyone that they could get as dressed up or not as they wished and that no one should think hats or gloves were necessary.

Now I love hats. I've got a closet full that I hardly wear because if you wear a hat indoors nowadays, people laugh at you. They do--it has happened to me! But in looking at my wardrobe, I discovered I only had one hat that was appropriate for a tea party, and it was from the 50s and not very flattering on me--especially since I cut my hair short this fall.

After a few hours of searching online for an appropriate hat, I stumbled on a hat pattern on Craftsy that I thought would work. I downloaded the pattern, and voila, a new hat!

My adorable new hat was designed by Wendy Talene of Elsewhen Millinery. You can buy the pattern on either Craftsy or at her Etsy shop. If you aren't a sewer, you can buy her ready made creations from Etsy as well.

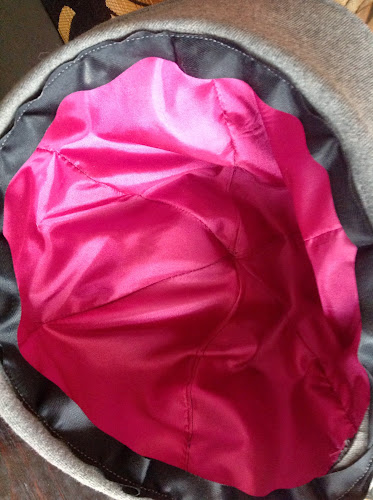
The pattern was remarkably easy to follow and I am thrilled with the result. The only thing I changed was that for the interior hat band, I used twill tape rather than preparing my own fabric strip. Attaching the tape was the only difficult part of the project. Mine is a bit wonky, so it is good that it is inside the hat. When I make another, and I will, I will top stitch the body around the brim and then attach the hat band by hand. I may also shorten the body panels slightly by taking out the seam allowance. I am only doing this because I don't have a lot of hair now. If I still had longer hair, it would fit perfectly as designed.

I was especially proud of my top stitching on this hat. It came out perfectly. Unfortunately, the brim is a little off kilter. Not much, but enough for me to notice. Even so, I've gotten a lot of complements. When I try another, I am thinking of using the fake fur craft felt. It looks a little like the curly wool used in the 20s and 30s and has the consistency to hold up nicely. I hope it looks good! I'd use that wool if I knew what it was called and where to find it, but I'm not sure that my sewing machine can get through that many layers.
Yesterday was our tea party. Here we all are at Fancy That in Walpole, MA enjoying ourselves while it snows outside. The piece of resistance was not the antique china or the fantastic food, but the bell that we were given to call our host--the owner's husband--whenever we needed anything. My girlfriends LOVED that!

In all, a perfect afternoon and a very good excuse for a new hat!