Saturday, May 25, 2013

Brazilian embroidery--Blumen Needle project (pattern #5002)

On Saturday I showed you how I set this project up and promised to update you on how far I've gotten since the beginning of the month. I decided to start working this piece when my April trip home to Boston was cancelled. Since I couldn't work on my WELCOME, I wanted to do a small Brazilian project, and I had had this one in my embroidery basket for several months.


It is a fantastic pattern by an independent designer. The directions are easy to follow, but if you decide to tackle it, be sure to have a Brazilian embroidery stitch reference with you. The stitches aren't hard, but there is no stitch instruction.


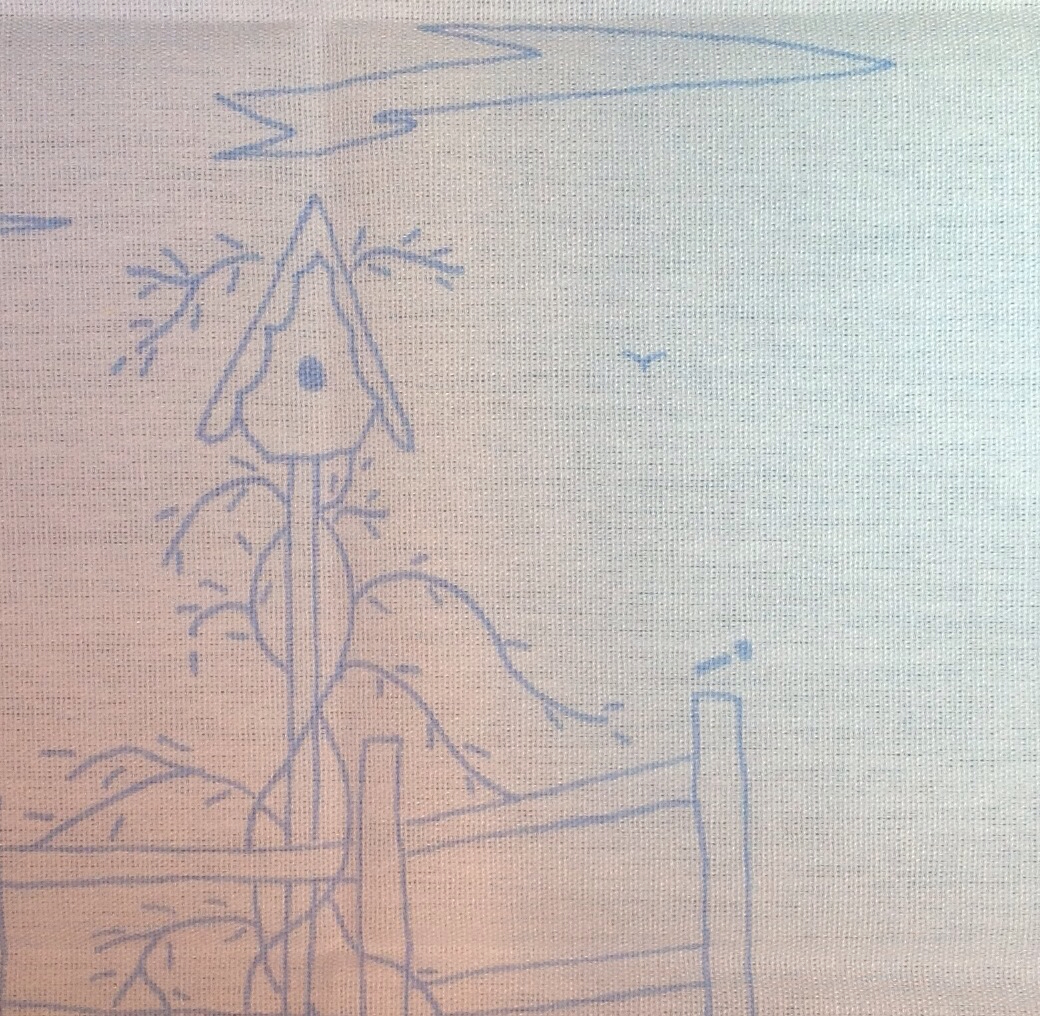
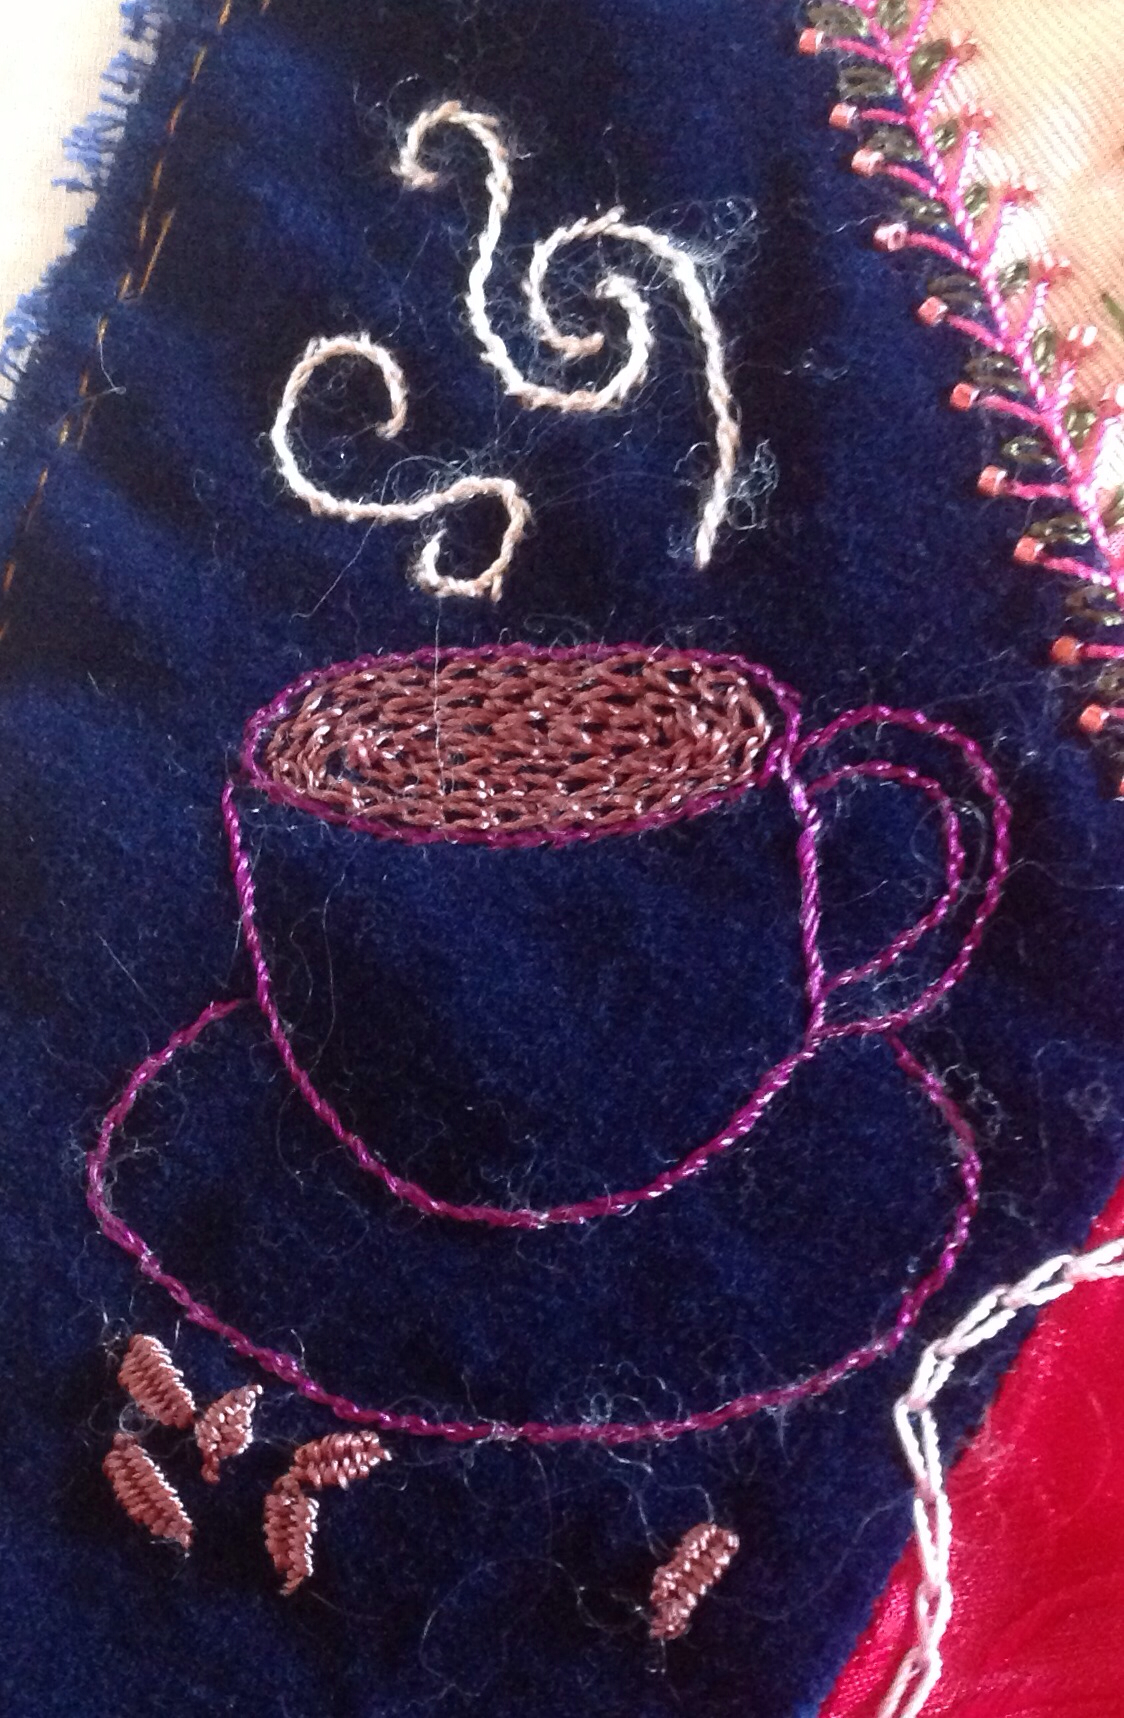
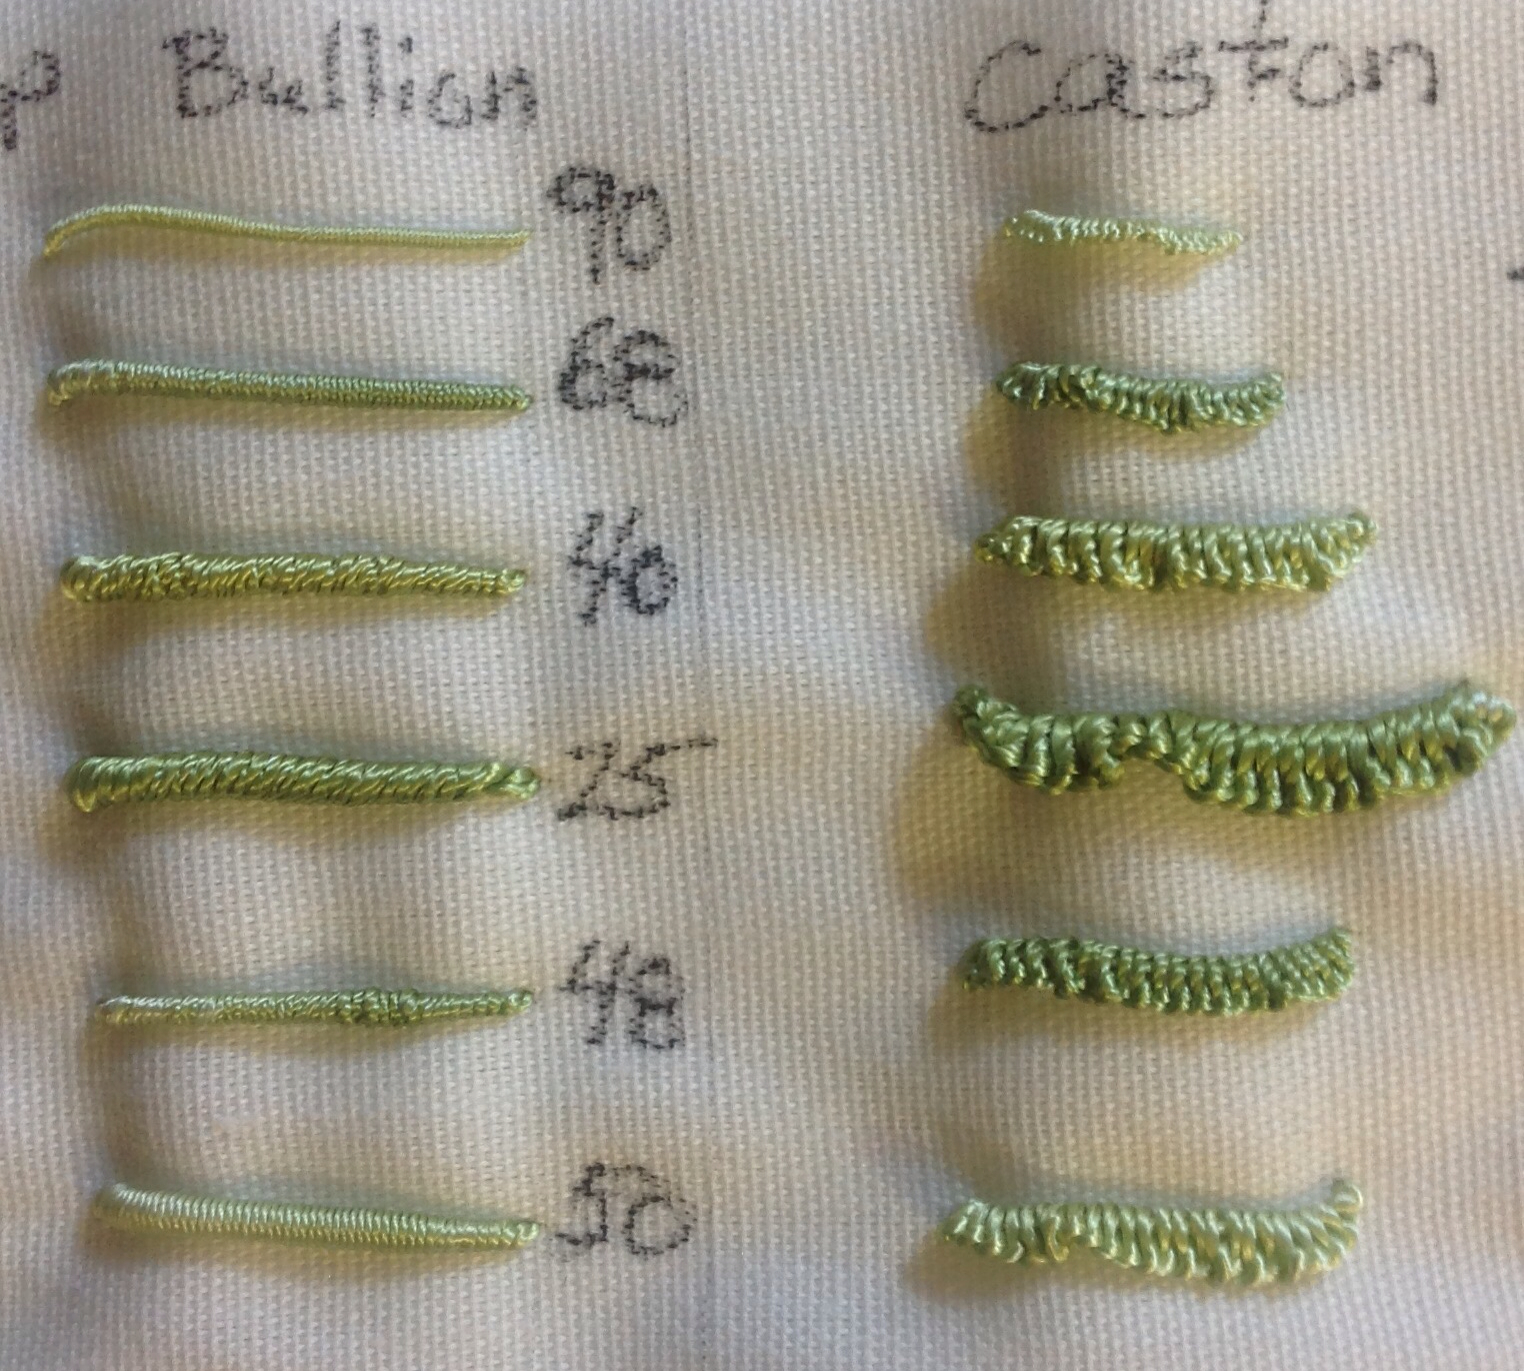
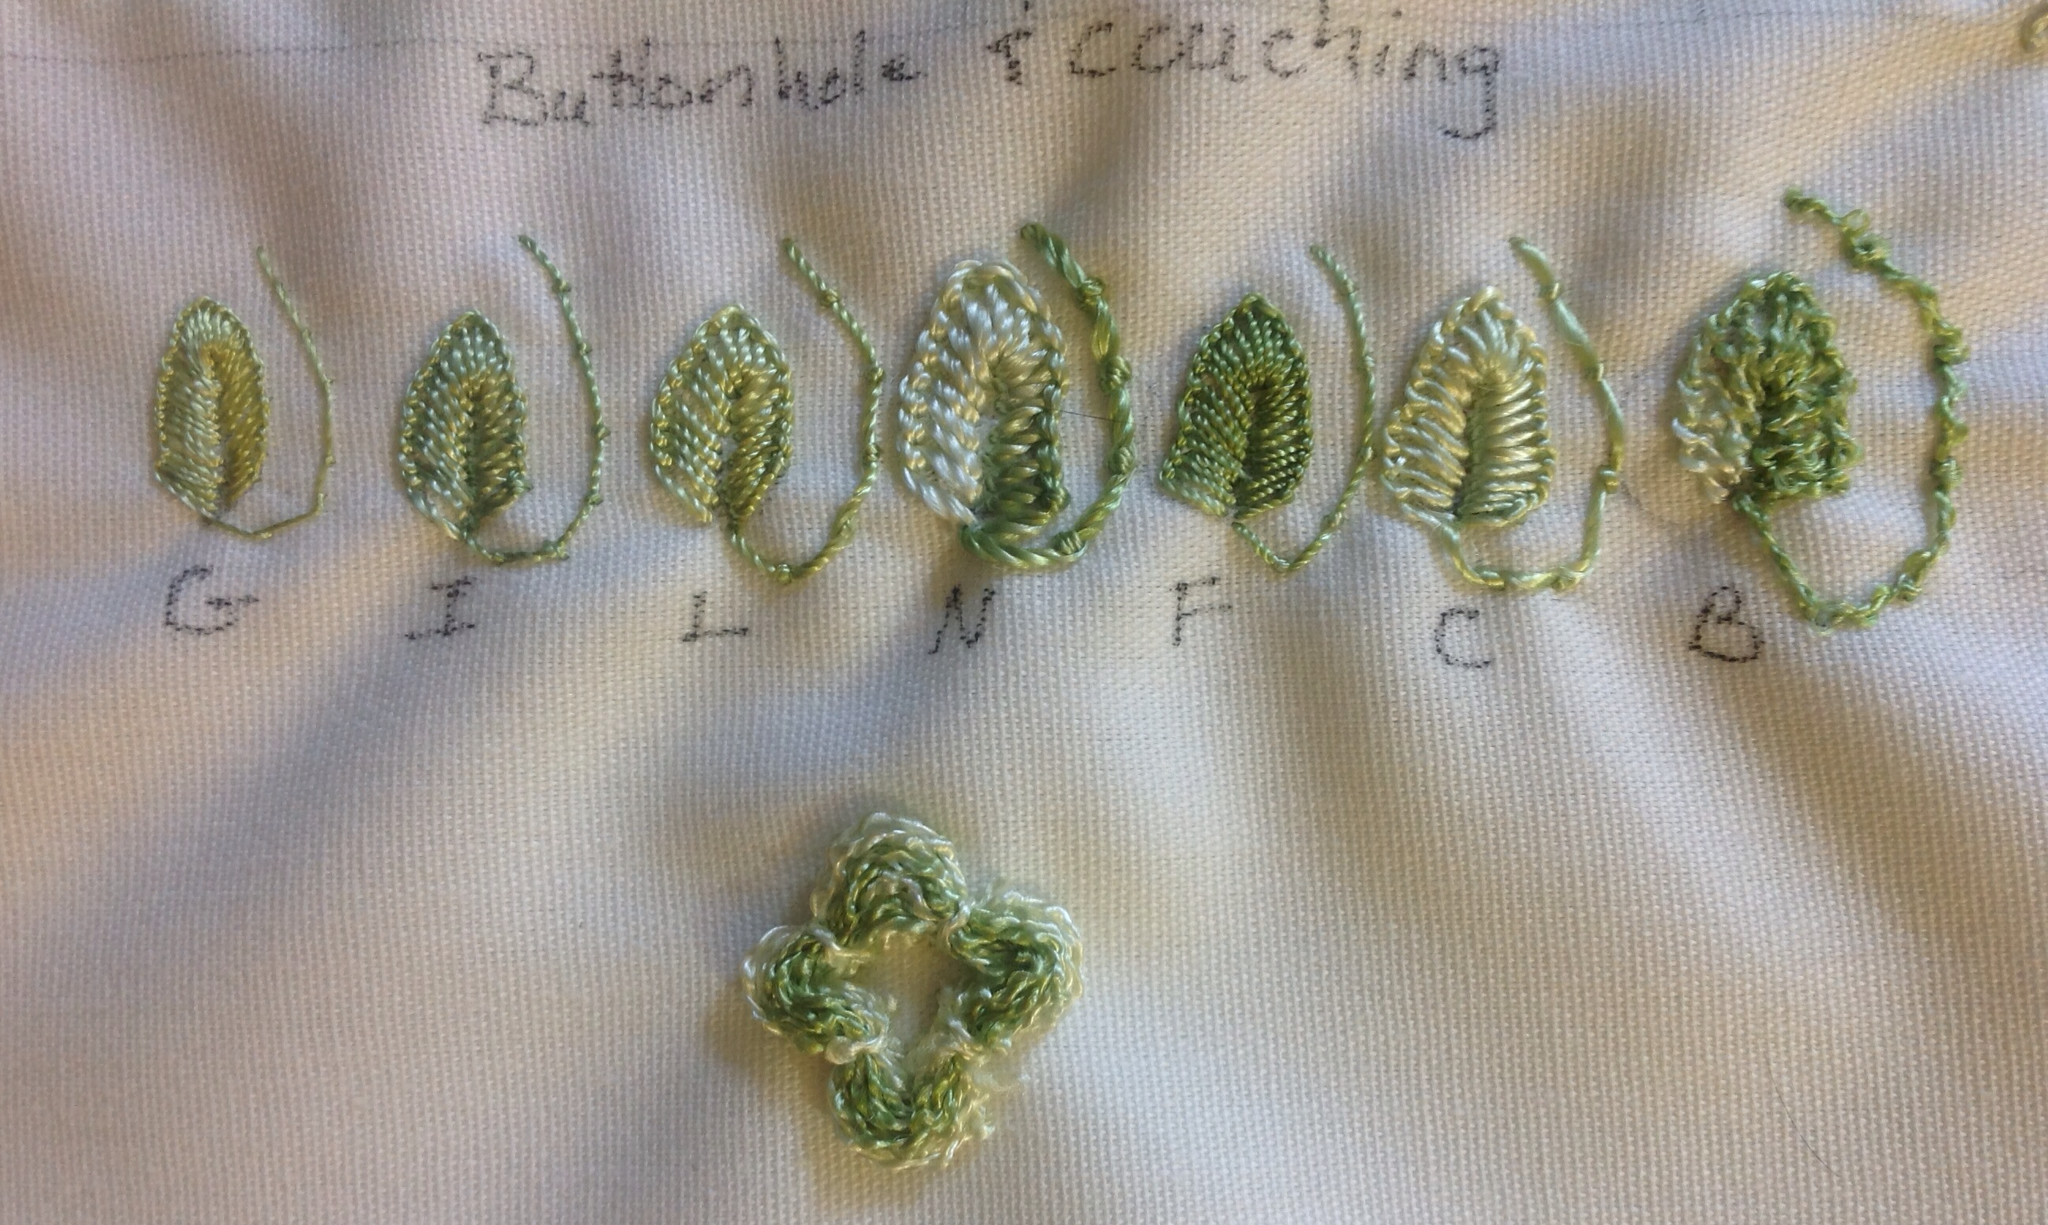
I didn't know when I started, but this lovely project is a study in cast ons and drizzles. The designer is very clever in using these stitches in unexpected ways and with unexpected effect. She makes it possible, for example, for vines to snake in, out and through fence posts. It is a 3-D effect that is wonderfully realistic.


The design utilizes cast ons, double cast ons, and several types of drizzles. It is eye opening how tiny variations change how these stitches work up. For example, just one little change makes the drizzle vines round in cross section rather than ribbon like. It is a lovely effect. Even the little roses are a cast on variation--something that really surprised me. And isn't the Victorian gingerbread on the birdhouse a cute way to use regular cast ons?


I'm really enjoying this project and have been learning a lot. But at long last, I'm back in Boston and taking up my WELCOME again. So this project gets set aside for now, and I'll update you on the WELCOME in a couple of weeks.


Wednesday, May 22, 2013

Needlework Fiction--Figures in Silk


Figures in Silk Vanora Bennett (2008)

***** 5/5 starsCheck out GoodReads for more reviews of this novel.


Set during the War of the Roses, Figures in Silk focuses on the merchants of London--especially the female silk workers, who often were declared freewomen in their own rights and allowed to make deals, take out loans, and hire their own workers. Loosely based on real characters, the plot focuses on a scheme to bring silk weaving to London, as well as the craft of silk embroidery. It brought 15th-century London alive in a way that a novel focusing solely on the nobility (for example The White Queen by Philippa Gregory or The King's Grace by Ann Easter Smith) cannot. More importantly, it showcases the strength that these women had to petition for their livelihoods and work to better their lives. A good read if you are interested in learning more about this time period, or in the lives and trials of women trying to make their way in the world. With characters such as the formidable Queen Elizabeth, her cowed but crafty daughter, one of the King's mistresses and silk women ranging from apprentices to rich merchants, you get an in depth look at how the medieval world viewed women and how they survived in a male-dominated society. The best part, however, is the discussion of the silk. You will fall in love with it, just as the main characters do.


Resources about places and things featured in this novel.

Vanora Bennett's website offers a fascinating article on the medieval history of the silk trade and the attempt by real London silk merchants to bring the secret of silk weaving to England.


To learn more about how medieval guilds worked, check out this artcle on British History Online.


Medieval Silkwork is a blog that focuses on the forms and techniques of late medieval and early modern silk working. It has photos, of early and reproduction pieces as well as patterns and discussions of techniques.


Saturday, May 18, 2013

Brazilian embroidery--setting up a new project

Brazilian embroidery is full of tough knots. This means that there is plenty of tugging on threads, which, in turn, puts substantial strain on the fabric you work with. That's why most commercial patterns are printed on trigger cloth, a hardy polyester/cotton blend. They are usually printed with ink that will wash out--something that is especially important for this 3-D technique since unattached petals can lift up and reveal the printed pattern beneath.

This is a portion of the printed pattern by Blumen Threads that I've just begun working.


Of course, you don't HAVE to use trigger cloth. I've seen people transfer designs to patterned cotton or towels, and I am experimenting with silks and satins.


It is not required, but my instructor has taught me to back my embroidery with Thermalamb, a dense polyester batting. It gives you're needle something to grip and helps you make knots without having them show as nasty bumps when your piece is finished. And believe me, you want to knot your Brazilian threads! They are so smooth that weaving them under previous stitches won't keep them from unraveling. You could probably pierce the thread with your needle, but if your work is destined to be a pillow or wall hanging, theThermalamb makes everything easier.

Thermalamb gives your knots something to attach to and disguises the lumps, bumps, and carried threads, such as these from double cast ons.


When you back your piece with thermalamb, it is best to either zig zag the edges together, or for a large piece, baste the whole piece. It keeps the trigger from shifting. After all the work of embroidering a piece, you don't want the thermalamb to be lumpy.

Zig zagging the edge helps keep the Thermalamb from shifting during embroidery.


Finally, if you back with Thermalamb, consider using Q-snaps for your frame. They fit easily over all that bulk and are more practical than a hoop for this type of embroidery. You will be taking your piece in and out of the frame often, so something that doesn't take long to set up is best. Get one big enough for your whole piece if you can. I hate to see people using a small frame and winding up crushing some of their 3-D effects.

Q-snaps come with interchangeable parts, making it easy to create the size and shape of frame you need.


Next week I'll show you the progress I've made on this piece.

Here is the front of my newly set up piece. The Q-snaps keep it taught, but are easy to release.


Wednesday, May 15, 2013

Crazy pumpkin update

April 6 was the last time that I showed you measly progress on my crazy pumpkin. I swore then that I would step up my stitching so that I could complete my pumpkin along with the rest of my guild in June. Well, the bad news is that it is May and I only have one of six panels done. The good news is I HAVE A PANEL DONE! So let's take a look.


Here is the whole panel. It measures about 18.5" x 9", including some fabric for trimming. I did not use a single one of the pattern motifs. I think that was laziness--I just didn't feel like tracing them! You can see that I have been using EdMar Brazilian threads, and I think the sheen looks great with the rich fabrics. I won't use rayon on everything, but I'm glad I did here. Since this is a stash busting project, it just made sense. Now let's look more closely.


I think that this is my favorite block. The spider is simply made up of a large round bead and two small beads plus some couched threads, but he looks scary--and the bead changes from brown to red depending on how the light hits him, which is even scarier. The web is couched threads and straight stitches.


The moon and stars were a late night inspiration. I didn't want another outline, but neither did I want to spend a long time stitching a motif, so I appliquéd the felt moon and put some straight stitch stars in the sky. I like him.


My coffee cup was done the last time we looked at this project, but up close you can see the woven detached chain stitches. So easy and so cute! You can also tell that my cats have been sleeping on this project. I'm not sure how I will get all the hair out, but it is fruitless to try until it is sewn up.


At our last pumpkin class, we all tried to think of scary, fall motifs for our pumpkins. That is when I thought of the owl eyes. The eye balls are actually made out of the same beads as the spider with little gold bead irises. The seam stitch is button hole with lazy daisy stitches, beads, and detached buttonhole along the base. The daffodils are woven pickets--something I always wanted to try.


I've been drawing rabbits like this one since I was in grammar school. My grandfather was an artist. He gave me some tips on how to draw bunny legs and I have been doing the same thing ever since. The bunny is stem stitched with boucle. I LOVE the carrot seam done with straight stitches and drizzles. It was another late night inspiration. The other seam is scalloped buttonhole chain stitch. See Mary Corbet's excellent tutorial on this stitch!


So, one panel done, five more to go. At least there is only one more crazy panel. Three panels each have all over motifs and the sixth is patchwork block. I won't finish by June, but I will keep plugging away. I am getting excited about finishing so that I can plan a real crazy quilt!


Saturday, May 11, 2013

Brazilian embroidery--threads, tips and tricks

In my first two posts on Brazilian embroidery threads, we looked at how to prep threads for use and how they look when worked up. In this final post on Brazilian threads, we'll go over a few useful tips to know.

1. Choose the correct needle for your thread.

Thread Type Needle
Glory         Milliner #7
Iris    Milliner #5
Lola           Milliner #1
Nova          Darner #18
Frost          Milliner #3
Circe          Milliner #1
Boucle       Darner #18


2. Buy all the thread you will need for a project at one time.

As good as EdMar thread is, its dye lots are notoriously difficult to match. So if you have a project that will need a lot of one color, buy more than you think you will need. It will save you a lot of stress. Additionally, don't necessarily expect that the colors will look the same in the different threads. If your Boucle is from one dye lot and the Iris is from another, you can't count on them being even similar. It is sometimes depressing to see the lack of consistency in color, but since most traditional Brazilian embroidery is floral, you can "blame" the changes in shade on nature.


3. To start off a thread, make a quilters knot.

To make a quilters knot, thread your needle. Then lay about 1/4 inch of the opposite end against the tip of your needle with the end pointing toward the eye of the needle. Hold the end in place and wrap the rest of the thread three times around your needle in a clockwise direction. Finally, pull the thread through the knot. Now you have a knot that won't slip apart. To make it even stronger, you can fray the end of your thread, although I usually don't.


Now you are ready to prep your first project. I'll discuss that next week.


Saturday, May 4, 2013

Brazilian embroidery--threads, part 2

In my last post on Brazilian embroidery, we looked at the different threads by EdMar and how to prep them for use. In this post, I will show you how they work up. It is as easy as threading a new needle to get a completely different look--even with the same stitch.


This sampler shows all seven threads (Glory (G), Iris (I), Lola (L), Nova (N), Frost (F), Circe(C) and Boucle (B)) worked up in the following popular Brazilian embroidery stitches: stem, french knots, bullion, cast on, lazy daisy buttonhole, and couching. Now let's look more closely.


First, you see stem stitch and 3-wrap french knots. There isn't much surprise that the heavier-weight threads make thicker lines and fuller french knots. Remember though, that this is a z-twist thread, so the thread gets thrown to the top instead of the bottom in the stem stitch and the knots are wrapped in a clock-wise direction.


Next is something I never tried before. First I made same length bullions in each thread, except Boucle. Look at how the number of wraps differ from 90 for glory to 25 for Nova. Unfortunately, my bullions are a bit messy since I haven't made any in awhile. I'd like to try this again after practicing more--I think it would up the number of wraps a bit, but the numbers would still be far apart. The cast-ons really demonstrate the difference, since each thread has 25 wraps.


The Lazy daisies, show off differences in the thread textures. Glory, Iris, Lola and Nova are all similar looking when worked, but Frost, Circe and Boucle are all quite different. Since Lola, Frost and Circe are all the same weight, it is even more striking.


The differences are even more profound on the buttonhole leaves. I love how shiny and soft the Circe looks.


Finally, since I wasn't about to attempt bullions or cast-ons with Boucle, I made a boucle flower done by wrapping the thread around two pins and then tacking it down. It demonstrates the 3-D effect you can get with Boucle.


I hope this helps gain a better understanding of EdMar threads, their similarities and differences and gives you some ideas on which thread to choose for specific tasks.